 Console Mods Console Mods
 These are mods that I've done on my own systems but I have worked on stuff for friends. I'm not open for modding work unless you're a friend of mine which if you are you probably have a way to communicate with me.
The Game Gear is one of my favorite systems and I find it very interesting. Like the Master System it uses the Z80 like the Master System making it a handheld that is more powerful than the NES before the Super Nintendo was released (a month before in Japan and 4 months before in the US) and while there are some differences Master System games are fully playable on the Game Gear. This along with a CFL bulb as a backlight is probably why it was so power hungry but nowadays there are ways to mitigate those problems making it an amazing handheld with a great library of games.
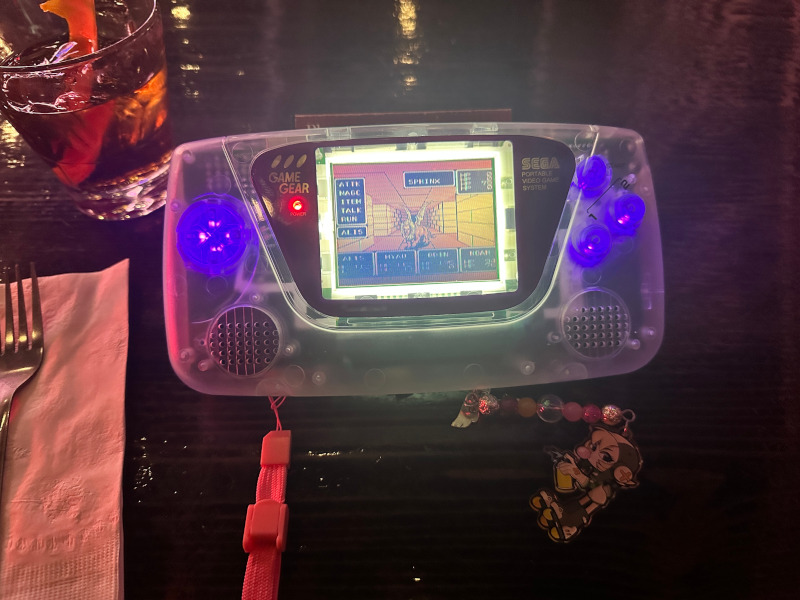
easily one of my favorite game systems in general, I like how it's a portable master system with more colors and how games sound. here is the progress so far
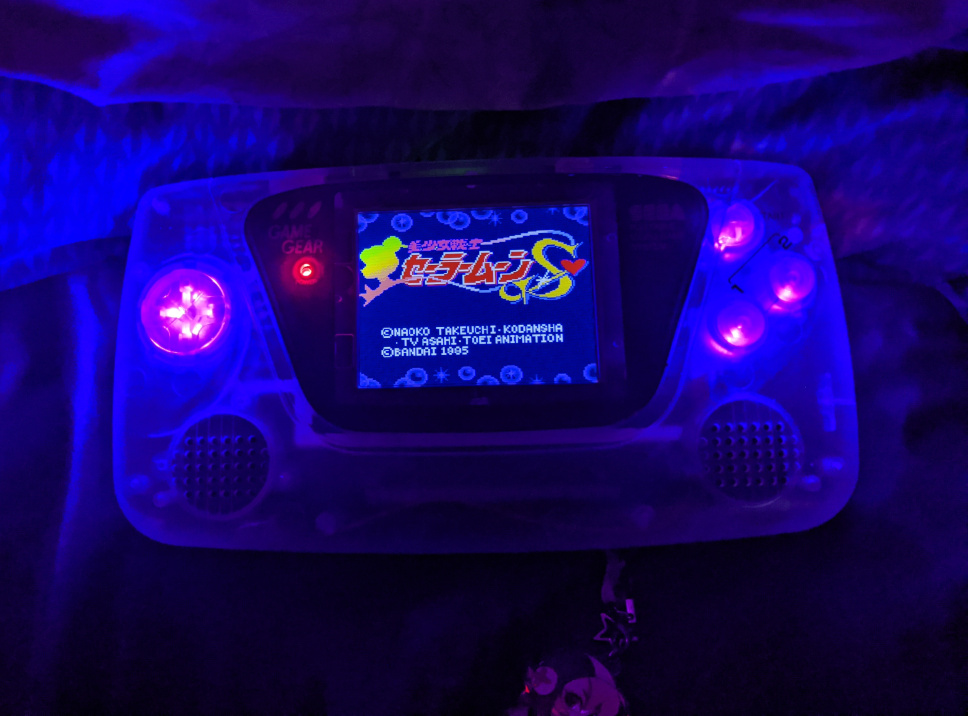
This is a LED strip for under the buttons. I avoided the one for the power led as it had it's original backlight and the LED posts were pretty close I didn't want to hit it with the soldering iron. I might add a stand alone purple LED in the future
it's also been recapped, screen replaced, I added batteries to charge via usb C, the clean amp amplifier and a new speaker and a clear shell with a purple lens
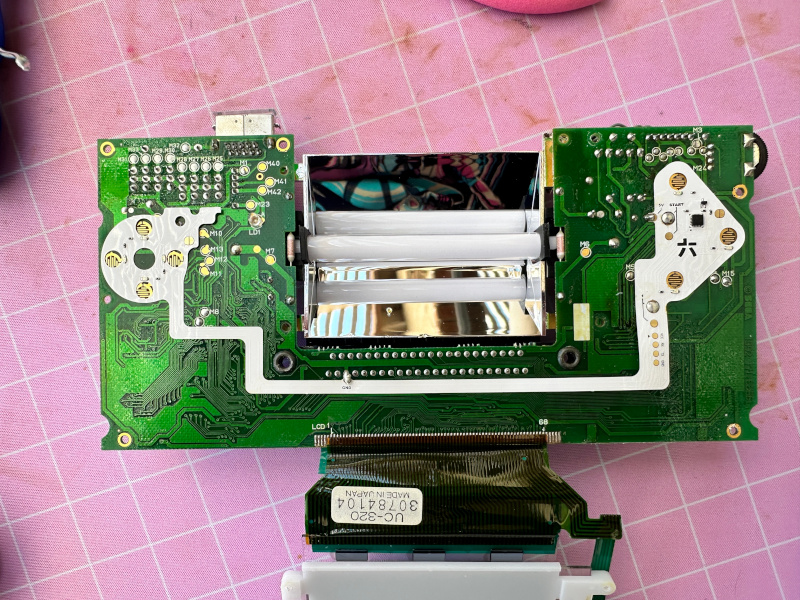
So this picture is showcasing that I added a modern led backlit screen instead of the CFL backlit replacement it had before. this being it's third screen made this mod actually a bit procarious bc the contacts for it have been weakened to the point that the pad I needed to solder to partially lifted :(
Note in the image above this video showing the LED strip as it shows that the old screen was backlit by a CFL bulb that required 34V (probably the main reason the battery life was so poor) and the old screen's ribbon was connected directly to contacts on the board. removing it requires slowly pulling it up while heating the contacts with a soldering iron, it's very easy to weaken the pads this way.
Luckily I managed with the rest of the pad and now it won't need a new screen for a long time and this mod now connects the screen to a pcb with a ribbon cable so I no longer need to connect to the weakened pads.
With a new screen and stereo speakers added to it I want to say it's now complete but I would still like to maybe add an HDMI out but I'm not sure about it yet.
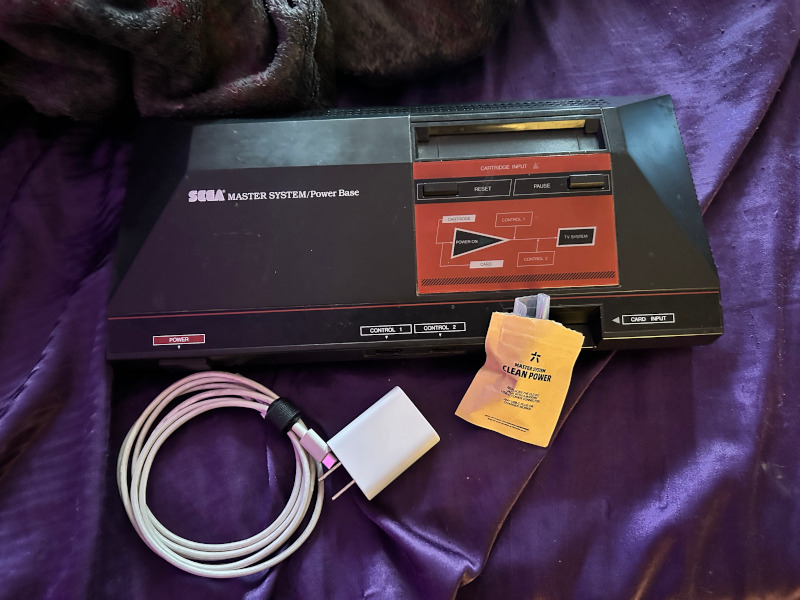
one of my oldest consoles, I have a soft spot for the master system honestly. I like how the games look, how the console looks and I appreciate what sega did here. here's what I've done so far on it
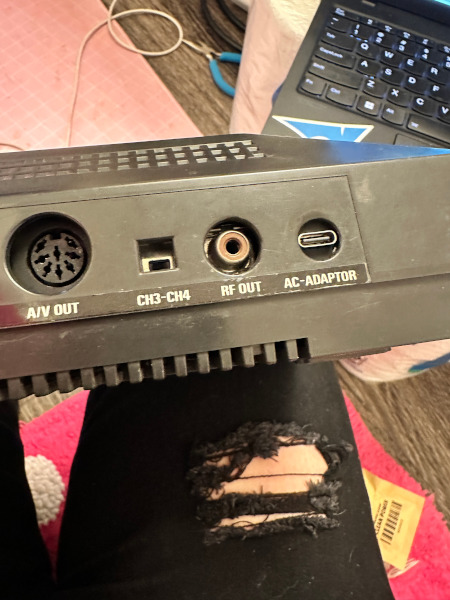
This was a pretty simple mod to do. Remove the old port, bypass the 9V regulator (with usb the voltage will only ever be 5) and connect the new port to power and ground. this is part of a larger project of replacing all my sega consoles with usb C power.
I've also recapped the system in hopes to alleviate some jailbar issues, idk if it helped the Master System will always have this issue without another mod explained here
I knew that it wouldn't fully fix the problem but I figured it was still worth doing as the original caps were almost 40 years old and I wanted more experience working on the system.
Eventually I want to add the FM sound mod as the US model 1 systems do actually have the capability and many of the games still have the FM soundtrack. I might also fix the jailbar issue but it's a bit more involved and it includes taking out the ability to have composite video. That's something I can live without but if I were to get a CRT later on it would have to have RGB capabilities like a professional monitor if I do this mod.
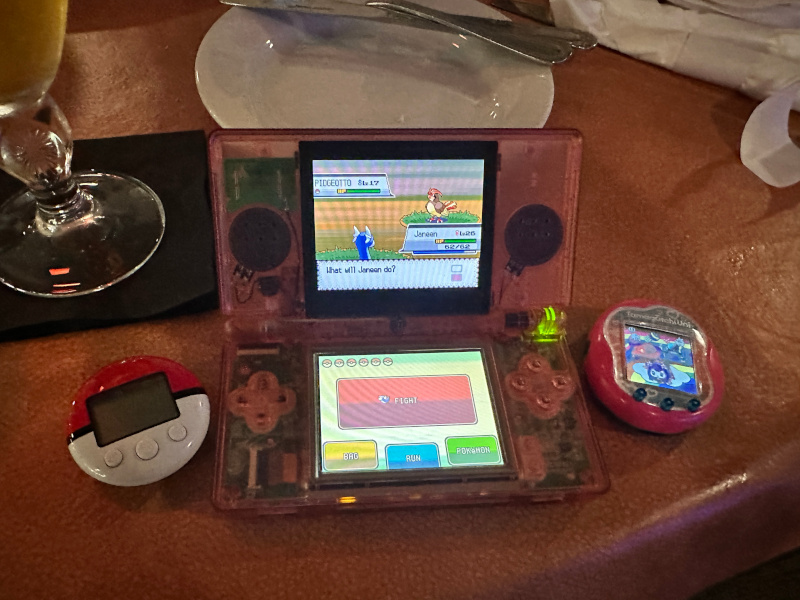
this was the most difficult console I've worked on so far, the dual screens and small triggers makes this very finicky to work on, here are the mods I've done so far
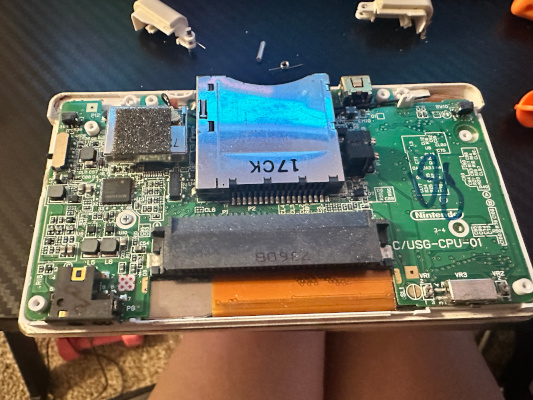
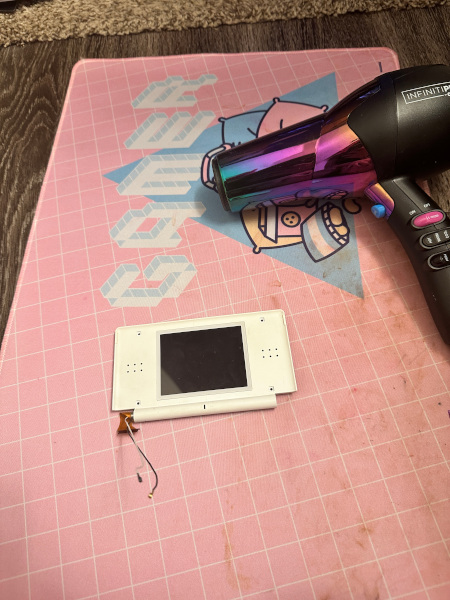
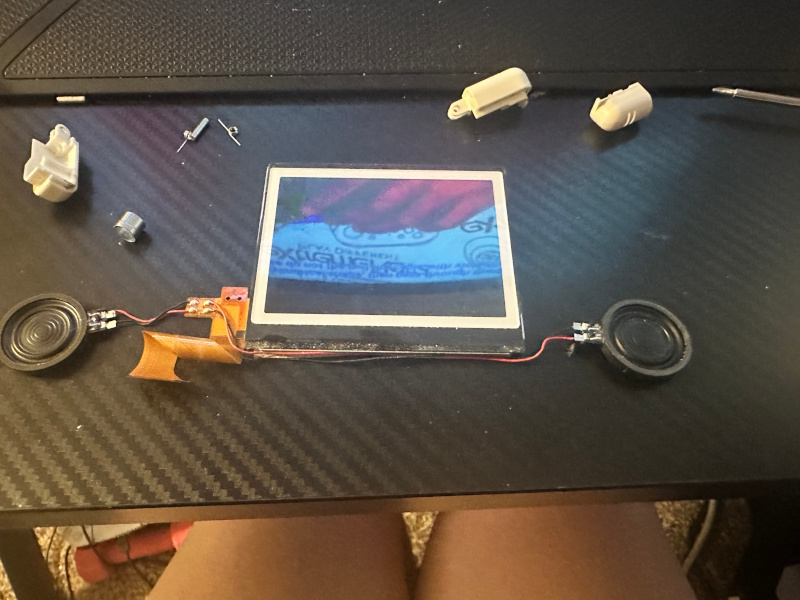
Fuck this was the toughest handheld to work on. there's a ribbon cable going thru the hinge, one of the cables for the wifi card is fished between the card reader and the board, the trigger springs are so finicky and I needed to use a hair dryer to remove the screens and digitizer.
Also my DS lite had one of it's triggers not work so I had to open up the trigger button casing and clean the contacts.
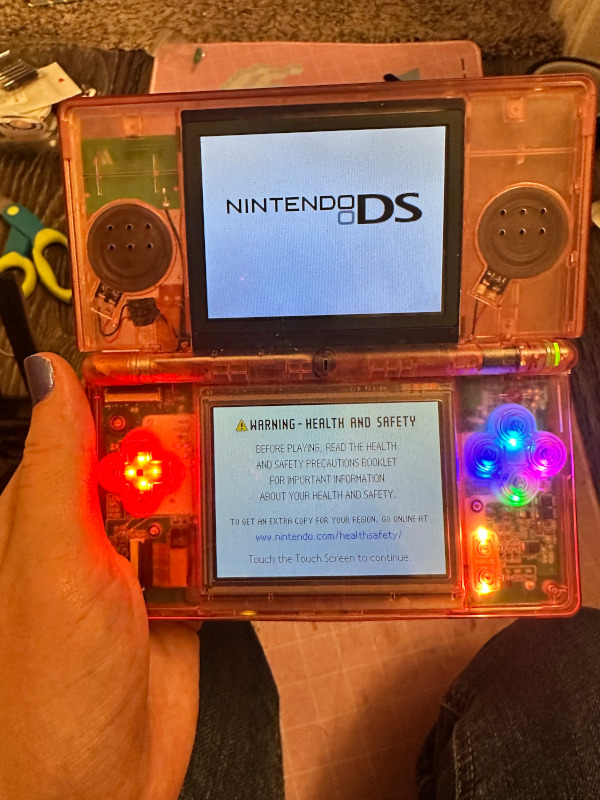
I have now added leds under the buttons (this is quickly becoming my calling card lol). Not much to say about this besides it actually being fairly simple to do, just soldering down a few points for the controls and power. The ground pad was a bit difficult due to the point on the strip being kinda small and the fact that ground ususally requiring alot of heat due to ground points throughout the board all being connected it just absorbs alot of heat before being able to actually attach solder to it.